How to Remove Hydraulic Clutch Line from Master Cylinder?
To remove the hydraulic clutch line from the master cylinder, first, locate the connection point. Then, release the retaining clip or fitting.
Maintaining your vehicle’s hydraulic clutch system is crucial for smooth operation and longevity. The clutch line, which connects the master cylinder to the slave cylinder, plays a vital role in this system. Over time, wear and tear or the need for replacement parts may necessitate removing the hydraulic clutch line.
Understanding the proper procedure ensures you can tackle this task efficiently and safely. This guide will walk you through the steps, ensuring you avoid common pitfalls and complete the job effectively. Proper maintenance and timely replacement can prevent bigger issues and keep your vehicle running smoothly.
Introduction To Hydraulic Clutch Systems
Understanding hydraulic clutch systems is vital for efficient vehicle operation. These systems use fluid to transmit force, ensuring smooth clutch engagement and disengagement. This guide will help you learn about the basics and components of hydraulic clutch systems.
Basics Of Clutch Operation
The clutch connects the engine to the transmission. It allows the driver to control the power flow. When the clutch pedal is pressed, the clutch disengages. This stops power from reaching the transmission. When the pedal is released, the clutch engages. This allows power to flow to the transmission.
Components And Their Functions
| Component | Function |
|---|---|
| Master Cylinder | Converts pedal force into hydraulic pressure. |
| Slave Cylinder | Receives hydraulic pressure and moves the clutch. |
| Clutch Line | Transmits hydraulic fluid between cylinders. |
| Clutch Pedal | Allows driver to engage or disengage the clutch. |
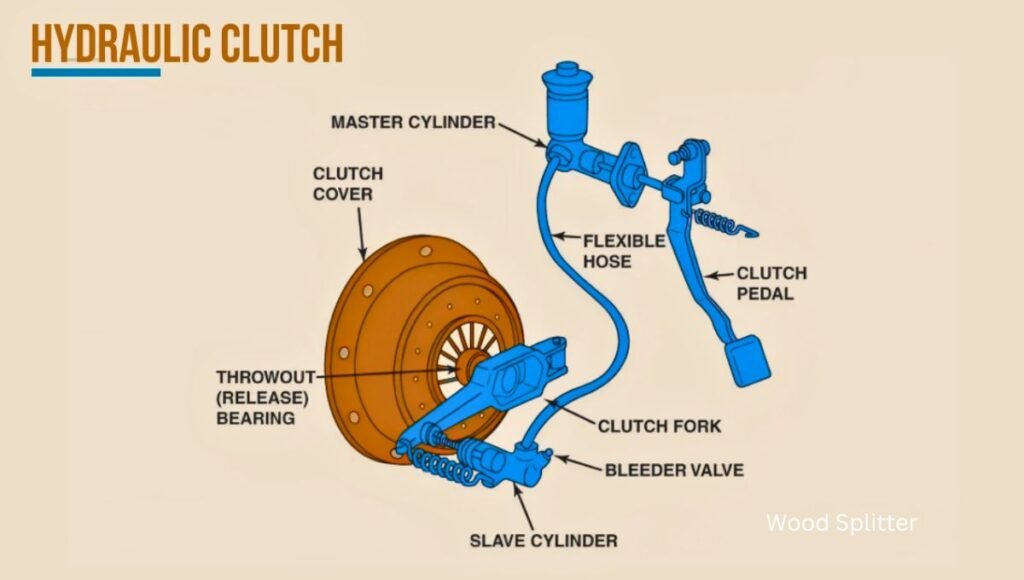
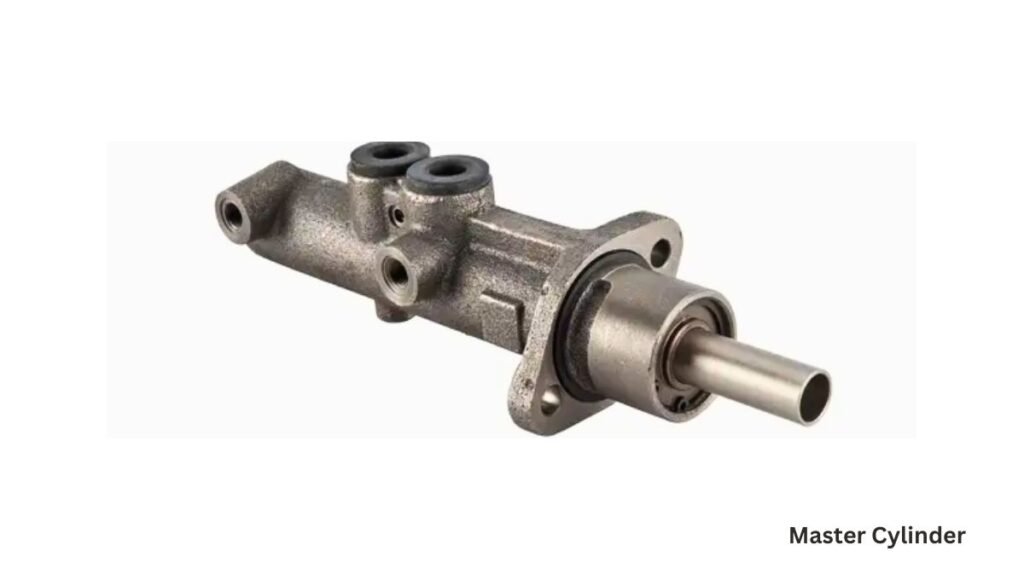
The master cylinder is essential for clutch operation. It transforms your pedal force into hydraulic pressure. This pressure travels through the clutch line to the slave cylinder.
The slave cylinder then uses this pressure to move the clutch. The clutch line is crucial as it carries the hydraulic fluid between these cylinders. Understanding these components ensures you can maintain and troubleshoot your hydraulic clutch system effectively.
Safety Precautions And Preparation
Removing a hydraulic clutch line from a master cylinder is a delicate task. Safety precautions and thorough preparation are crucial for a smooth process. This guide helps you stay safe and prepared.
Essential Tools For The Job
Gather these tools before starting:
- Wrench set
- Line wrench
- Drain pan
- Brake cleaner
- Rags
Ensure all tools are clean and in good condition. Proper tools make the job easier and safer.
Protective Gear And Safety
Wear the right protective gear to ensure your safety:
- Safety glasses
- Gloves
- Protective clothing
Safety glasses protect your eyes from fluid splashes. Gloves keep your hands safe from chemicals. Protective clothing prevents stains and injuries.
Initial Steps Before Removal
Before removing the hydraulic clutch line from the master cylinder, follow these initial steps. Ensuring the vehicle is in the right position and the hydraulic system is depressurized is crucial. This guarantees safety and efficiency.
Vehicle Positioning
Start by positioning your vehicle on a flat surface. Use wheel chocks to prevent any movement. Turn off the engine and allow it to cool down. Safety should be your priority here. Make sure the parking brake is engaged. This helps avoid any accidents.
Depressurizing The Hydraulic System
Depressurizing the hydraulic system is essential. Open the hood and locate the master cylinder. Use a wrench to loosen the bleed valve. Have a container ready to catch any fluid. Slowly press the clutch pedal to release pressure.
Check for any leaks around the master cylinder. Ensure all fluid is drained properly. This step prevents any spillage during the removal process.
Identifying The Master Cylinder
Knowing how to remove the hydraulic clutch line starts with identifying the master cylinder. The master cylinder is a crucial part of your vehicle’s clutch system. It helps convert mechanical energy into hydraulic pressure. This pressure then moves the clutch. Below, we’ll help you locate the master cylinder and recognize the clutch line.
Locating The Master Cylinder
Open your car’s hood. Look for the brake fluid reservoir. The master cylinder is usually nearby. It is typically a small metal component. It has a reservoir attached to it. The master cylinder is connected to the clutch pedal. It is often found on the driver’s side of the engine bay. If unsure, consult your car’s manual. The manual will have diagrams. This will help you identify the master cylinder.
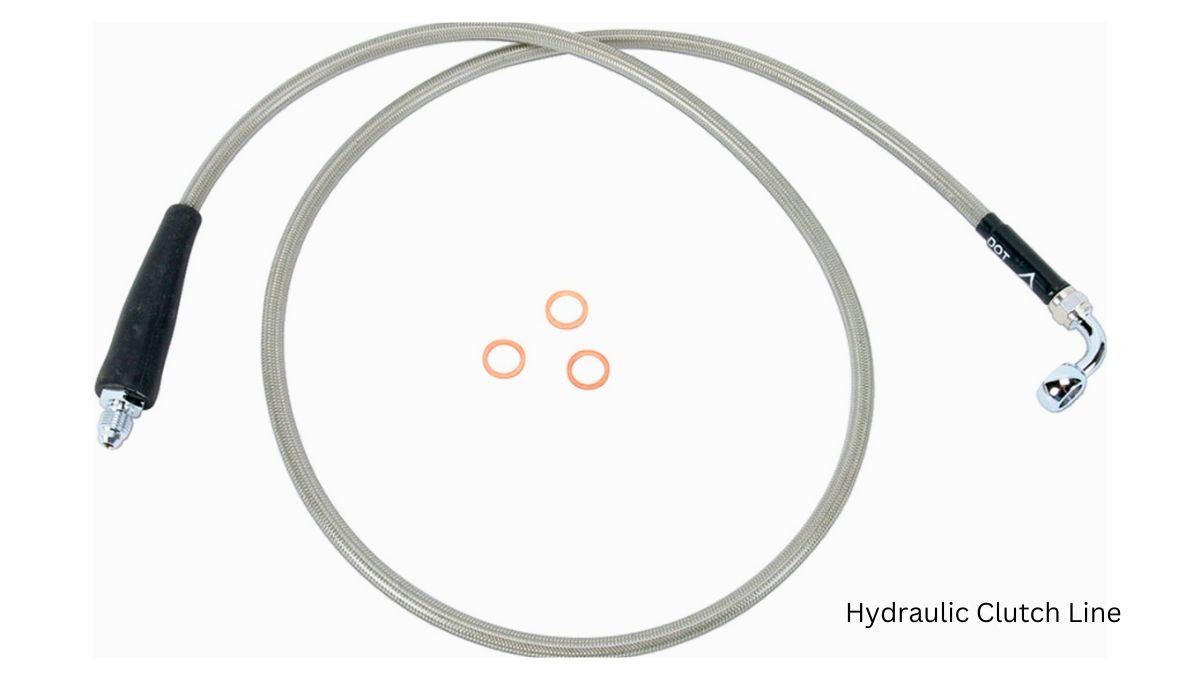
Recognizing The Clutch Line
The clutch line connects the master cylinder to the slave cylinder. It is often made of metal or braided steel. The clutch line is usually thin. It can have a rubber coating. Trace the line from the master cylinder. It will lead to the slave cylinder. The slave cylinder is near the transmission. By following this line, you can easily recognize it. Look for any connectors or fittings. These are points where you can disconnect the line. Make sure the car is off. This ensures safety while working on the clutch line.
Disconnecting The Clutch Line
Removing the hydraulic clutch line from the master cylinder is crucial. This step ensures a smooth clutch operation and prevents any leaks. Follow these easy steps to disconnect the clutch line.
Tools For Detachment
Before you start, gather all necessary tools. Having the right tools makes the job easier and quicker.
- Wrench Set – Use different sizes for various nuts and bolts.
- Drain Pan – Catch any fluid that might spill.
- Safety Gloves – Protect your hands from the fluid.
- Rag or Cloth – Wipe off any spills.
Step-by-step Disconnection Process
Follow these steps to disconnect the clutch line safely:
- Locate the Master Cylinder – Find it near the firewall of your car.
- Place the Drain Pan – Put it under the master cylinder to catch any fluid.
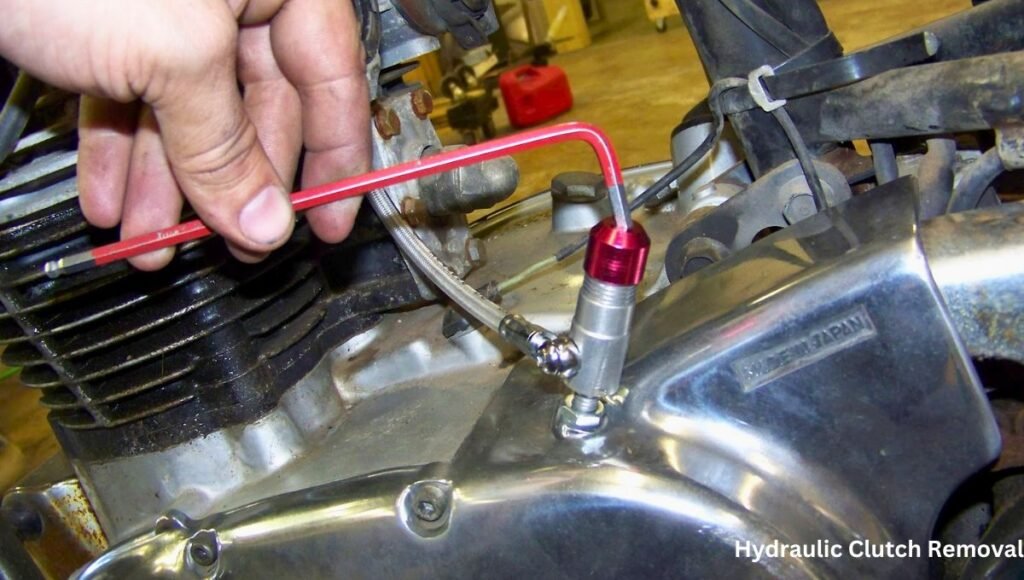
- Loosen the Fitting – Use the wrench to loosen the clutch line fitting.
- Remove the Clutch Line – Gently pull the clutch line away from the master cylinder.
- Wipe Up Spills – Use a rag to clean any spilled fluid.
These steps ensure a safe disconnection of the clutch line. Ensure all tools are at hand before starting.
Handling The Fittings
Handling the fittings on a hydraulic clutch line requires precision and care. Properly managing the fittings ensures the system remains intact and leak-free. Let’s explore the types of fittings and methods to remove them without causing damage.
Types Of Fittings
Hydraulic clutch systems use various types of fittings. Here are some common ones:
- Compression fittings: These use a compression nut and ring.
- Flare fittings: These have a conical end that creates a seal.
- Push-to-connect fittings: These allow quick connections without tools.
Knowing the type of fitting helps in using the right tools and techniques.
Removing Fittings Without Damage
Removing fittings without damage is crucial. Here’s a step-by-step guide:
- Gather Tools: You need wrenches, pliers, and a clean cloth.
- Release Pressure: Ensure the hydraulic system has no pressure.
- Loosen Fittings: Use the correct wrench to loosen the fitting.
- Protect Threads: Wrap a cloth around the fitting to protect the threads.
- Remove Fitting: Carefully unscrew the fitting by hand.
Here is a quick table for visual reference:
| Step | Action |
|---|---|
| 1 | Gather tools |
| 2 | Release pressure |
| 3 | Loosen fittings |
| 4 | Protect threads |
| 5 | Remove fitting |
By following these steps, you ensure the fittings remain undamaged and the hydraulic system stays functional.
Troubleshooting Common Issues
Removing the hydraulic clutch line from the master cylinder can be tricky. You might face several common issues. Here’s how to troubleshoot them.
Leakage Problems
One common problem is fluid leakage. Check if the fluid is leaking from the connection point. Use a clean cloth to wipe the area. Look for wet spots. If you find any, the seals might be worn out.
Replace the old seals with new ones. Make sure they fit properly. Tighten the connections securely. Be careful not to overtighten, which can cause damage.
Another cause of leakage can be a cracked line. Inspect the hydraulic line closely. If you see any cracks or holes, replace the line immediately. This will prevent further leaks and ensure safety.
Stuck Or Seized Components
Sometimes, parts can get stuck or seized. This makes removal difficult. First, try to loosen the components gently. Use a wrench to apply gradual pressure.
If the parts are still stuck, use a penetrating oil. Apply it to the seized area. Let it sit for a few minutes. This helps to loosen the rust or dirt.
Another method is to use heat. A heat gun can be effective. Apply heat carefully to the stuck component. Be cautious not to overheat and damage nearby parts.
If the part remains stuck, consider using a special tool. A hydraulic puller can help. This tool applies even pressure to remove seized parts.
| Issue | Solution |
|---|---|
| Leakage | Check seals and replace if needed |
| Cracked Line | Inspect and replace the line |
| Stuck Parts | Use penetrating oil or heat |
With these troubleshooting tips, you can remove the hydraulic clutch line easily. Ensure all parts are in good condition. This will keep your vehicle running smoothly.
Reassembly And Testing
After successfully removing the hydraulic clutch line from the master cylinder, the next step is reassembly and testing. This ensures that everything works smoothly and safely. Follow these steps to reconnect the clutch line, bleed the system, and test the function.
Reconnecting The Clutch Line
- Ensure all parts are clean and free of debris.
- Align the clutch line with the master cylinder port.
- Insert the clutch line into the port firmly.
- Secure the connection with the retaining clip or nut.
- Check the connection for tightness and stability.
System Bleeding And Function Test
Bleeding the system removes air bubbles from the clutch line. This step is crucial for proper clutch function.
- Locate the bleeder valve on the slave cylinder.
- Attach a clear hose to the bleeder valve.
- Place the other end of the hose in a container.
- Have a helper press the clutch pedal several times.
- Open the bleeder valve to release air and fluid.
- Close the valve when fluid runs clear without bubbles.
- Repeat the process until no air remains in the system.
- Check the clutch fluid level and top up if necessary.
After bleeding the system, test the clutch function.
- Press the clutch pedal and check for smooth operation.
- Ensure the pedal returns to its original position.
- Start the vehicle and engage the clutch.
- Shift through all gears to confirm proper engagement.
Ensure everything functions correctly and there are no leaks.
Maintenance Tips
Keeping your hydraulic clutch system in top shape is crucial. Regular maintenance ensures smooth operation and prevents costly repairs. Here are some essential tips for maintaining your hydraulic clutch line.
Regular Inspection Routines
Inspect the hydraulic clutch line regularly. Look for signs of wear or damage. Check for leaks, cracks, or any unusual wear. Use a flashlight to inspect hard-to-see areas. If you find any issues, address them immediately.
- Inspect the clutch line for leaks and cracks.
- Check the fluid level in the master cylinder.
- Ensure the fittings are tight and secure.
Preventative Measures For Longevity
Preventative maintenance extends the life of your hydraulic clutch. Follow these steps to keep it in top condition.
- Replace the clutch fluid regularly.
- Bleed the hydraulic system to remove air bubbles.
- Lubricate moving parts to reduce wear.
Use quality parts and fluids. Substandard products can cause damage. Keep the area around the master cylinder clean. Dirt and debris can cause problems. Following these tips ensures your hydraulic clutch system lasts longer.
How Do You Disconnect A Hydraulic Clutch Line?
To disconnect a hydraulic clutch line, locate the master cylinder. Use a wrench to unscrew the fitting. Carefully pull the line away. Ensure no fluid spills.
What Tools Do I Need To Remove A Clutch Line?
You will need a wrench set, pliers, and a catch pan. Always wear gloves and safety glasses.
Is It Necessary To Drain Fluid Before Removing?
Yes, draining the hydraulic fluid is essential. It prevents spills and contamination. Use a catch pan to collect the fluid.
Can I Remove The Clutch Line Myself?
Yes, you can remove it yourself with basic tools. Follow safety guidelines and consult your vehicle’s manual for specific instructions.
Conclusion
Removing the hydraulic clutch line from the master cylinder is straightforward with the right tools. Follow the steps carefully for safety. Regular maintenance ensures your vehicle runs smoothly. Refer to your vehicle’s manual for specific instructions. Enjoy a seamless driving experience with a properly functioning clutch system.